Saving cost and latency in RAG
As many of you know, particularly those building RAG applications, the context window of an LLM is only so large. Throwing an entire dictionary at a large language model for the definition of a single term just isn’t feasible! This is why we use retrieval augmented generation. Additionally, the number of contexts we retrieve is hardly ever more than a handful.
As the number of retrieved results increases, so do likely irrelevant results for a targeted question. Moreover, processing additional tokens increases latency and cost when inferencing your LLM.
Including too many references could degrade the quality of the model’s response, even causing crucial information to get “lost in the middle”.
This brings me to my latest endeavor — taking advantage of the recent prompt compression library from Microsoft Research, LLMlingua. However, rather than sharing yet another Jupyter notebook, this time I wanted to implement a real production ready, low latency solution!
If you wish to skip straight to the code, I have included my repo for this project here -> https://github.com/jlonge4/runpod_llmlingua
Step 1 — Building the handler script
Fortunately, RunPod makes the process of building your own container super easy by providing a starting point rather than making us build our solution from scratch.
You can find the RunPod template here if you desire to build something yourself -> https://github.com/runpod-workers/worker-template/tree/main
After cloning the repo, I defined the handler function containing the logic for our LLMlingua powered endpoint. The best practice is to load your model into memory outside of the handler function so that it is ready before starting the serverless function.
                      from runpod import serverless
                      from llmlingua import PromptCompressor
                      import torch


                      llm_lingua = PromptCompressor("models/phi2")
                      torch.set_default_device("cuda")


                      def handler(job):
                       """Handler function that will be used to process jobs."""
                       job_input = job["input"]

                       context = job_input.get("context", [""])
                       instruction = job_input.get("instruction", "")
                       question = job_input.get("question", "")
                       target_token = job_input.get("target_token", 1000)

                       compressed_prompt = llm_lingua.compress_prompt(
                       context=context,
                       instruction=instruction,
                       question=question,
                       target_token=target_token,
                       rank_method="longllmlingua",
                       )
                       return compressed_prompt

                      serverless.start({"handler": handler})
Step 2 — Building the container
With our handler defined and ready to receive requests, our next step is to build out the container.
I had quite a bit of fun optimizing for the smallest possible image size and minimum dependencies needed in order to facilitate a minimum cold start time and deliver the fastest inference possible!
I recently stumbled upon the very impressive UV library from the creators of ruff for python linting, and have been using its impressive speed for Docker builds ever since. You can find more on the UV project here -> https://github.com/astral-sh/uv. Pairing both UV with a multi-stage build proved to be a winning combination.
Now for the Dockerfile:
                        FROM python:3.11-slim-buster as builder

                        ARG WRK_DIR=/app
                        WORKDIR ${WRK_DIR}

                        COPY builder/requirements.txt /requirements.txt
                        COPY /builder/download_model.py /download_model.py

                        ENV VIRTUAL_ENV=/${WRK_DIR}
                        RUN python3.11 -m venv ${WRK_DIR}
                        ENV PATH="${WRK_DIR}/bin:$PATH"
                        ENV UV_HTTP_TIMEOUT=600

                        RUN python3.11 -m pip install uv &&
                          python3.11 -m uv pip install --no-cache-dir -r /requirements.txt
                        RUN python3.11 /download_model.py


                        FROM runpod/base:0.4.0-cuda11.8.0
                        COPY --from=builder /app/models/phi2/ /models/phi2/
                        COPY --from=builder /app/lib/python3.11/site-packages/ .
                        ADD src .

                        CMD python3.11 -u /handler.py
Step 3 — Adding the support script
Now that the handler script and Dockerfile are created, the only thing left to do is write a support script responsible for downloading the model we will use to power our PromptCompressor. This way, the model is not pulled from hugging face each time a cold start of the function is started, massively reducing latency.
                      from transformers import AutoTokenizer, AutoModelForCausalLM
                      import os


                      def download_model(model_path, model_name):
                          """Download a Hugging Face model and tokenizer to the specified directory"""
                          # Check if the directory already exists
                          if not os.path.exists(model_path):
                              # Create the directory
                              os.makedirs(model_path)

                          model = AutoModelForCausalLM.from_pretrained(
                              model_name, torch_dtype="auto", trust_remote_code=True)
                          tokenizer = AutoTokenizer.from_pretrained(model_name, trust_remote_code=True)
                          # Save the model and tokenizer to the specified directory
                          model.save_pretrained(model_path)
                          tokenizer.save_pretrained(model_path)


                      download_model("models/phi2/", "microsoft/phi-2")
Step 4 — Deploy the Solution
Now that we have put all of the components in place, built the image, and pushed it to Dockerhub, deployment is accomplished in just a few clicks.
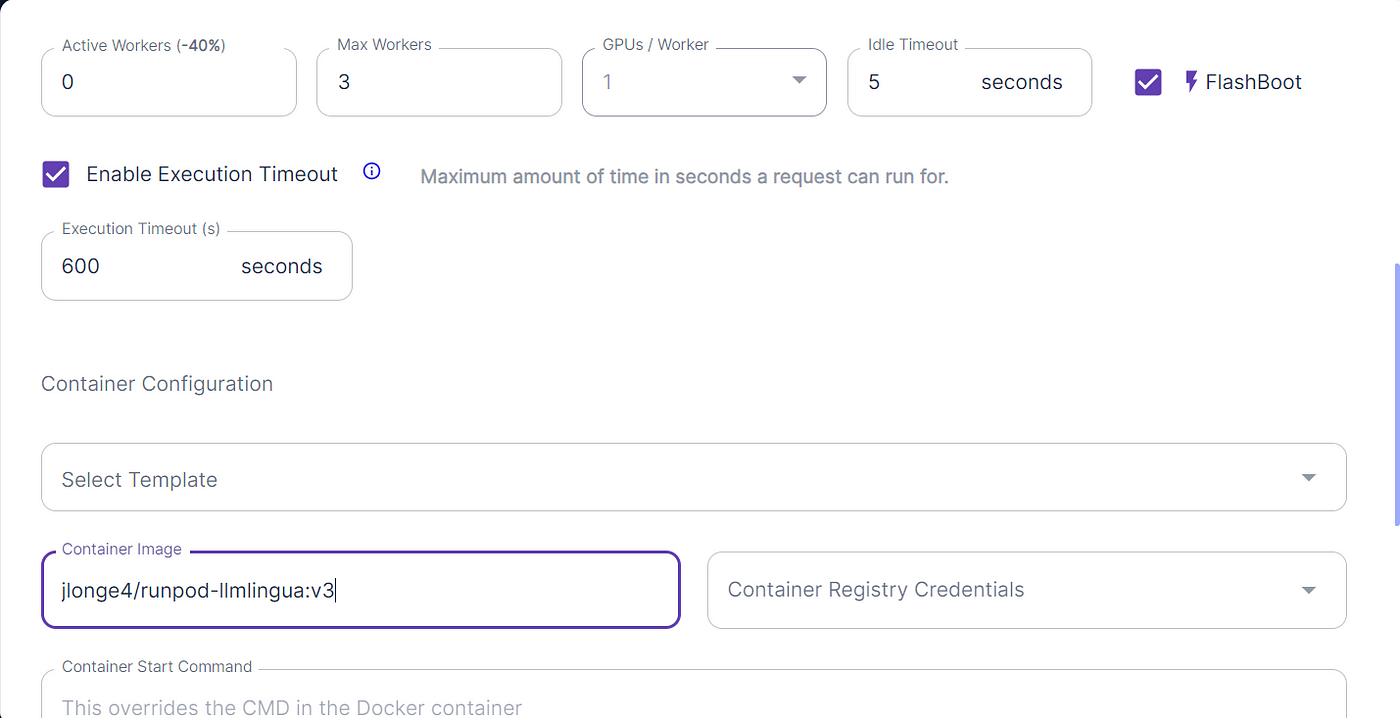
Navigate to your RunPod account and select Serverless -> New Endpoint. Once you are there, you will see a screen like this:

Here you will select the necessary GPU, active workers, etc. Personally, I opted for the 24GB Pro GPU for testing purposes, but should do just fine with the 16GB option. One of the coolest options available is the FlashBoot option, which can potentially bring cold starts down to just 500ms. You can read more about that here -> https://blog.runpod.io/introducing-flashboot-1-second-serverless-cold-start/.
With our solution deployed and API calls ready to be made, I started testing with great satisfaction!
Here are the results given a query over approximately 2100 tokens of context:
                      #Input
                      {
                      "input": {
                              "context": "[context]",
                              "instruction": "You are a q/a bot who uses the provided context to answer a question",
                              "question": "What's the purpose of the tutorial?",
                              "target_tokens": 350
                          }
                      }
                      #Output
                      {
                      "compressed_prompt": "You are a question answering bot who uses the provided\n"
                                               "context to answer a question\n"
                                               "In this short will explore how Face be deployed in a\n"
                                               "Docker Container and a service...\n"
                                               "What's the purpose of the tutorial?",
                          "compressed_tokens": 788,
                          "origin_tokens": 2171,
                          "ratio": "2.8x",
                          "saving": "Saving $0.1 in GPT-4."
                      }
Voila! We accomplished a 2.8x prompt compression ratio saving us $0.10 using GPT-4. Now I can incorporate this solution into any RAG app for faster and more efficient LLM inference!
If you made it to the end, thanks so much for reading my article. I hope you find it useful, and feel free to leave a clap so I know you enjoyed it!
Happy coding!


